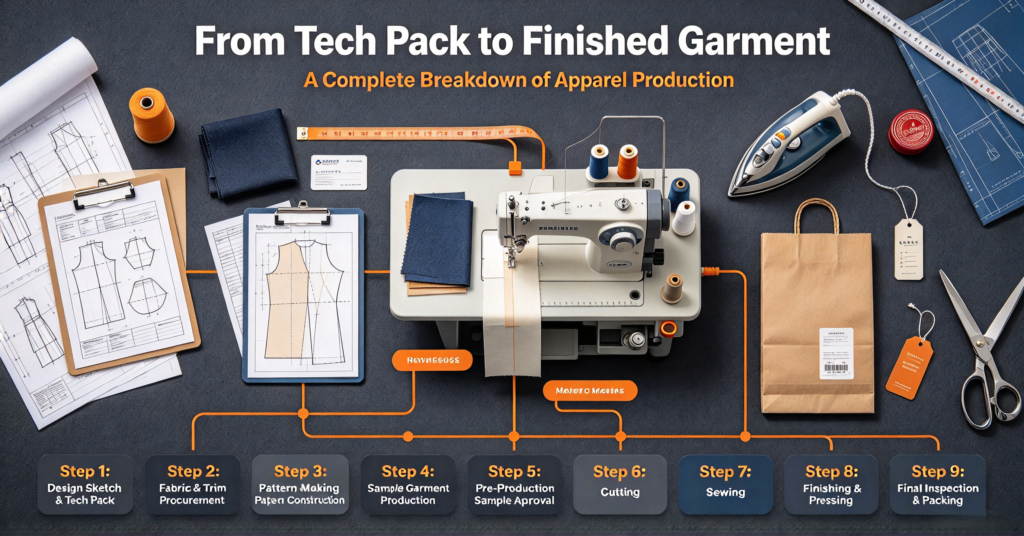
Apparel manufacturing is a chain of interlinked processes. A single oversight at any step can affect the final garment‘s quality. Many people assume making clothes involves just three steps: design, pattern-making, and sewing. In reality, turning a design sketch into a qualified finished garment requires more than a dozen stages. Breaking them down is the only way to truly understand how a garment is made.
Step 1: Design Sketch & Tech Pack
A design sketch isn’t just an illustration. It needs detailed design notes, fabric composition, weight, color, construction requirements, and reference samples or images. The more complete the information, the smaller the deviation in subsequent stages. Once the design is finalized, a tech pack must be produced—size chart, tolerance ranges for each measurement, fabric and trim details, colorways, construction requirements, and packing instructions—all documented in writing. The tech pack is the construction blueprint for the entire production process. Everything downstream follows it.
Step 2: Fabric & Trim Procurement
Purchasing teams take the tech pack to fabric suppliers, requesting samples to confirm whether handfeel, color, and weight match the design requirements. Once fabric is confirmed, a sealed sample is retained as the benchmark for bulk acceptance. Trims must be prepared simultaneously—zippers, webbing, woven labels, hangtags, packaging bags. Each item needs its specifications and quality confirmed. The arrival time of fabric and trims directly determines the production schedule.
Step 3: Pattern-Making & Paper Pattern Construction
Pattern makers translate the flat design drawing into a three-dimensional paper pattern structure based on the design sketch and tech pack. This stage is the core of design realization. The pattern maker‘s understanding of silhouette and proportion directly determines how the garment looks and moves on the body. After the pattern is made, an initial sample is produced using available fabric to check whether the structure is reasonable, proportions are balanced, and range of motion is sufficient.
Step 4: Sample Garment Production
Sample room technicians produce a complete sample garment based on the paper pattern and fabric. The sample’s purpose is to verify design feasibility and serve as the physical reference for quality standards between brand and factory. After the sample is made, it needs to be fitted on a model to assess dynamic effect, size accuracy, fabric handfeel, construction details, and trim quality. Issues are documented, patterns revised, and the sample re-confirmed.
Step 5: Pre-Production Sample Approval
This step is often skipped—but it is the most critical. Before bulk cutting begins, a pre-production sample must be made using bulk fabric. Why? Because sampling used sample fabric. Bulk fabric may come from a different batch, with different shrinkage rates and handfeel. The pre-production sample is the preview version of the bulk order. Once the brand approves it, the bulk acceptance standard is set. Skipping the pre-production sample and cutting directly is essentially gambling on fabric batch consistency and production line reproducibility.
Step 6: Cutting
After bulk fabric enters the warehouse, it first undergoes pre-shrinking and relaxation to allow natural shrinkage and dimensional stabilization. Then spreading and marker-making: the marker maker arranges the most material-efficient cutting layout based on the paper pattern. Finally, cutting according to the marker layout. Cut pieces are sorted by size, numbered, and bundled. Cutting accuracy directly affects sewing efficiency downstream—inaccurate cut pieces mean every subsequent process deviates.
Step 7: Sewing
Cut pieces are distributed to sewing stations according to the process flow and sewn according to tech pack requirements. This stage requires strict control of stitch density, thread tension, and fabric feed. After the first piece comes off the line, the pattern maker and QC must jointly confirm it before production continues. During sewing, reinforcement processes such as overlocking, bar-tacking, and bartack stitching are interspersed, along with special processes like printing and embroidery sent out for external processing.
Step 8: Finishing & Pressing
Sewn garments undergo thread trimming and pressing. Pressing temperature and pressure must be adjusted according to fabric characteristics. Too high, and the fabric burns. Too low, and it won‘t hold its shape. After pressing, the garment’s silhouette and texture finally emerge.
Step 9: Final Inspection & Packing
Inspectors examine finished garments according to AQL standards—checking dimensions, color consistency, loose threads, and construction defects. Batch defects require full-batch rework. Qualified garments are packed by specification, labeled, boxed, and warehoused for shipment.
These nine stages are interlinked. A problem at any stage propagates to the next, ultimately affecting garment quality and delivery. Brands don‘t need to perform every step themselves—but they need to understand the logic of these processes. That’s how they communicate effectively with factories and quickly identify where responsibility lies when quality issues arise.
The degree of standardization in a production process determines the depth of a brand‘s supplier management. The clearer the process, the smoother the communication—and the lower the probability of rework.
At Xiamen Outfree Apparel, we walk through these nine stages every day. Understanding the full chain is how we help brands catch problems before they become returns.
#ApparelManufacturing #GarmentProduction #QualityControl #SupplyChain #TechPack #OutdoorApparel #OutfreeApparel #OutfreeOutdoor